
When working on AI projects, we tend to make all the initial development on our laptops and then communicate those to the client. It might happen that the client does not share the same Operating System which means that the code will probably not run on their side. This is where Docker comes into play!
In this article, we will go through the main motivations behind Docker and how it allows building OS-agnostic products that enable faster development and deployment.
The summary is as follows:
- What is Docker?
- Setup
- From an AI project to Docker image
- Docker compose
- Best practices
What is Docker
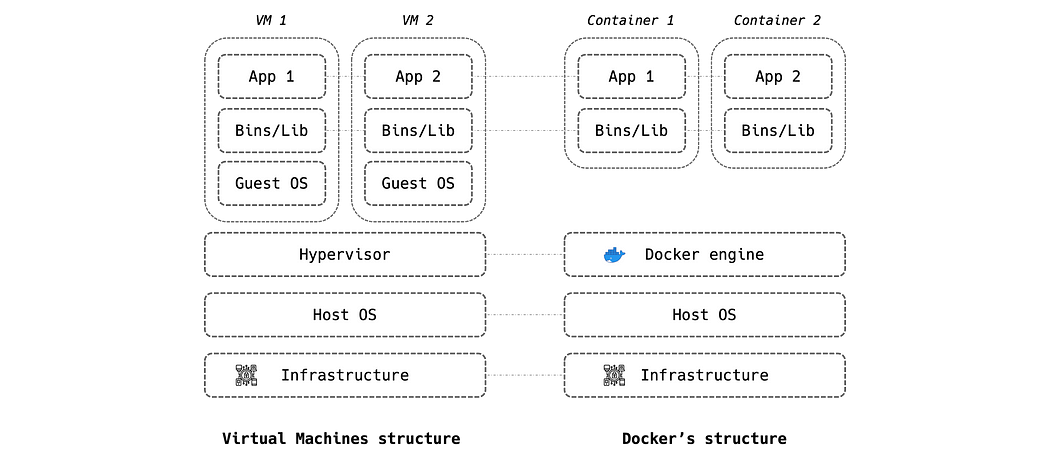
Docker is a process isolator tool which allows to run apps in a confined environment. It is very often confused with virtual machines which “virtualize” physical resources while Docker virtualizes the execution environment and is consequently much lighter and faster to start and run.
Docker was mainly invented to make programs OS-agnostic in order to facilitate development and deployment. A data scientist, for instance, can write his program on macOS and run it using Docker on the client’s IT infrastructure no matter its OS (macOS, linux, Windows, …).

Docker introduces different notions:
• Dockerfile: a set of actions that are executed with caching in the written order
• Docker image: the system of files and installation (from the Dockerfile) you will need to run your program without any attached process
• Docker container: is an instance of the image hosting a copy of all the files and the needed programs with an attached and interactive process through a terminal
• .dockerignore: a file hosting all the paths of elements you don’t want to host on your docker image
• entrypoint.sh: a cmd file that determines the commands to be launched when running the container
Docker also provides Dockerhub, a cloud service that can host shared Docker images that can be pushed and pulled by teams. It also hosts official language images such as Python’s.
Setup
You can install Docker using its official website by selecting the operating system installed on your machine.
Once the installation is completed, launch Docker and run the following command line to check if everything is OK:
docker run hello-world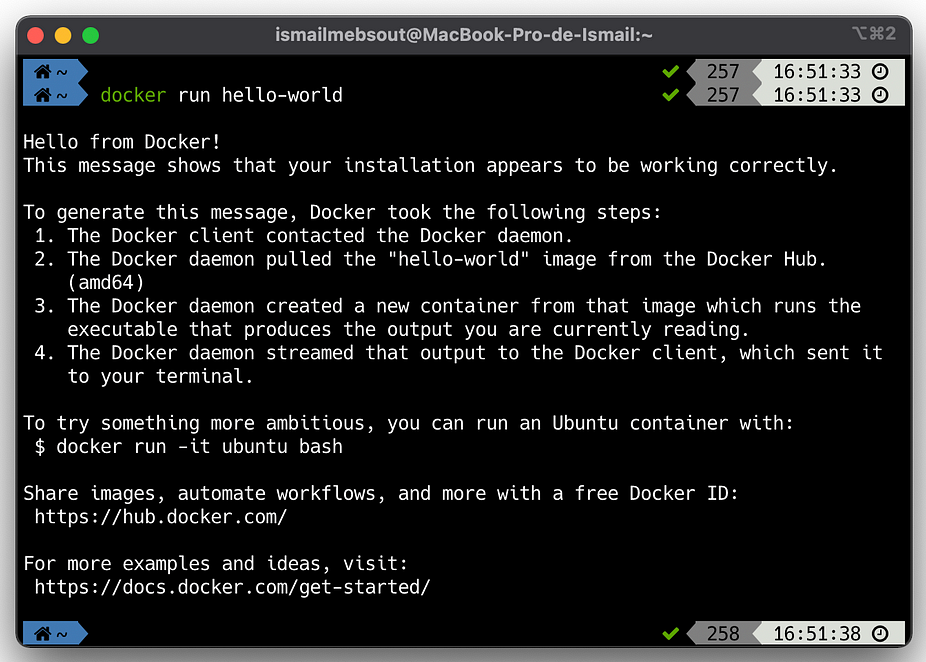
From an AI project to Docker image
Setup
The “dockerization” of your AI project is set into place once the developments are stabilized, which we assumed are written in python language.
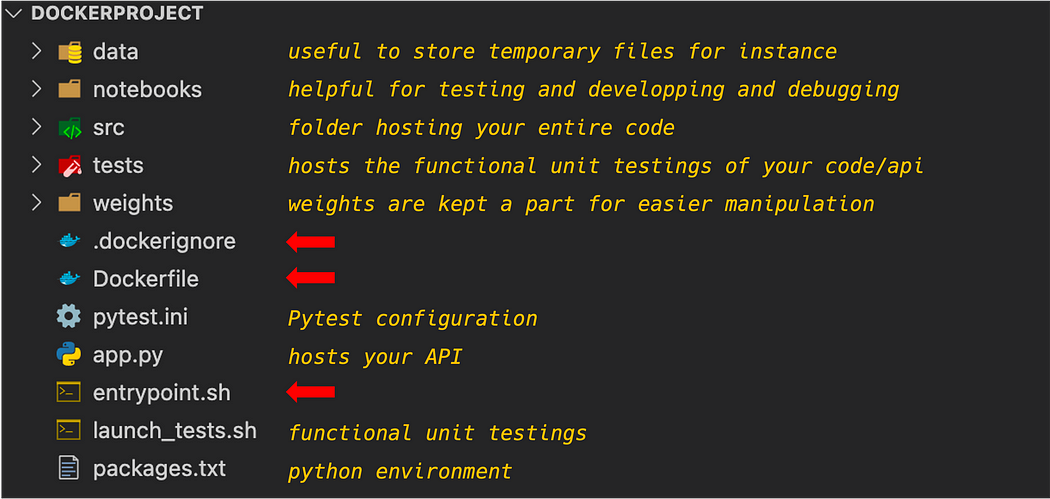
The files Dockerfile, .dockerignore and entrypoint.sh are put on the root of the repository as follows (check my previous article for project organization):
+We define the entrypoint.sh as follows:
#!/bin/bash
set -xe
case $1 in

    test)
    python -m pytest -v --tb=line tests/unit_testing.py
    action_1)
    python app.py fonction_1;;

    action_2)
    python app.py fonction_2;;
esac
+To create the Dockerfile 🐳:
- Choose the python version from Dockerhub, say python:3.7-slim-buster with debian OS:
FROM python:3.7-slim-buster- Install the necessary modules using apt-get (liblept5 for instance):
RUN apt-get update -y\
&& apt-get install -y liblept5- Create the folder data/ which will be the working directory:
RUN mkdir /data
WORKDIR /data- We copy all the files and folders of the local repository into the folder /data of the Docker image except the ones mentioned in .dockerignore :
ADD . /data- We install Virtualenv, create project_vir_env, activate it, and then install all the python requirements in it:
RUN pip install virtualenv
RUN virtualenv project_vir_env
RUN . project_vir_env/bin/activate
RUN pip install -r packages.txt- We add execution rights to the entrypoint file and set it as so:
RUN chmod +x /data/entrypoint.sh
ENTRYPOINT ["data/entrypoint.sh"]
The Dockerfile is as follows:
FROM python:3.7-slim-buster
RUN apt-get update -y \
    && apt-get install -y liblept5 \

RUN mkdir /data
WORKDIR /data
ADD . /data
RUN pip install virtualenv
RUN virtualenv project_vir_env
RUN . project_vir_env/bin/activate
RUN pip install -r packages.txt
RUN chmod +x /data/entrypoint.sh
ENTRYPOINT [ "/data/entrypoint.sh"]
+We also define .dockerignore:
project_vir_env/
notebooks/
.vscode/
**/__pycache__/
.DS_Store
Launch
In order to build the docker image, first launch the docker engine and then run the following command-line:
docker build -t nameofdockerimage .- -t : is for naming the image
- . : is the location of the Dockerfile (current folder)
You can run a container by using the following command-line:
docker run -v $PWD:/data/ nameofdockerimage entrypointfunction- -v: is used to define volume and links your current directory (project repository) with the data/ folder of your container
- nameofdockerimage: is the same as the one used in the building stage
- entrypointfunction: is one of the functions defined in entrypoint.sh (test, action_1 or action_2)
You can check this cheat sheet for the possible docker commands.
Docker compose
When working on a complex project, the final product might be composed of different services such as a frontend, an DS API, and a Database. Docker-compose is a docker orchestrator that helps you “dockerize” and organize all your services in a multi-containers format.
For the sake of illustration, we will consider a python app with a Streamlit frontend that calls a Flask API to compute the sum of two numbers. The structure is as follows:

The structure of the project is the following:
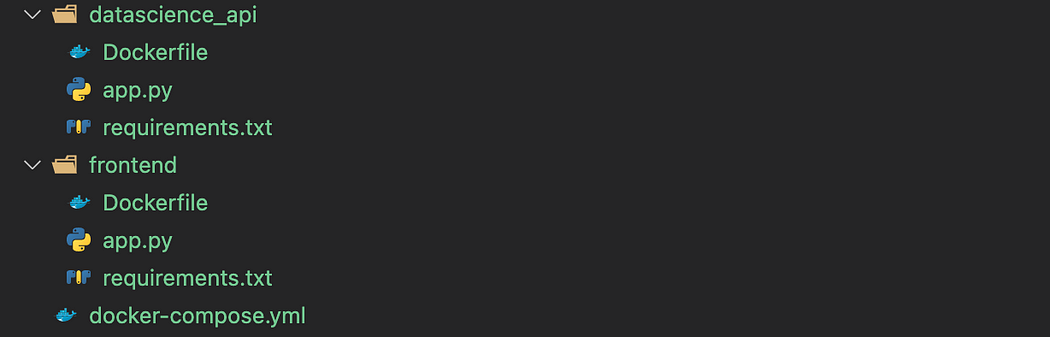
Each service has its own Dockerfile:
- Dockerfile of Data Science API:
FROM python:3.7-slim-buster
RUN mkdir /ds_api
WORKDIR /ds_api
ADD . /ds_api
RUN pip install virtualenv
RUN virtualenv api_vir_env
RUN . api_vir_env/bin/activate
RUN pip install -r requirements.txt
EXPOSE 8080
ENTRYPOINT ["python"]
CMD ["app.py"]
- Dockerfile of the frontend:
FROM python:3.7-slim-buster
RUN mkdir /frontend_dir
WORKDIR /frontend_dir
ADD . /frontend_dir
RUN pip install virtualenv
RUN virtualenv front_vir_env
RUN . front_vir_env/bin/activate
RUN pip install -r requirements.txt
EXPOSE 8501
ENTRYPOINT ["streamlit", "run"]
CMD ["app.py"]
The DS API is exposed on the port 8080 while the frontend is exposed on the port 8501
To manage both of the services at the same time, we will need to create a docker-compose.yml 🐳:
- We first set docker-compose version
- Then we define the services of our app which would be launched in a differents containers. Within each server we define:
+ container name
+ hostname
+ build (folder and name of the service’s Dockerfile)
+ ports (of exposition): machine_port:container_port
+ restart (approach)
version: '3'
services:
  datascience_api:
    container_name: datascience_api
    hostname: datascience_api
    build:
      context: ./datascience_api
      dockerfile: Dockerfile
    ports:
      - 8080:8080
    restart: unless-stopped
  front:
    container_name: frontend
    hostname: frontend
    build:
      context: ./frontend
      dockerfile: Dockerfile
    ports:
      - 8501:8501
    restart: unless-stopped
    depends_on:
- datascience_apiNB1: The frontend service depends_on the datascience API, which need to be run at first.
NB2: The frontend call the DS API using its container’s name through http protocol:
requests.post(“http://datascience_api:8080/add", params=query).json()Once the docker-compose file in finished we run the following command-lines at the root of the project:
docker-compose build
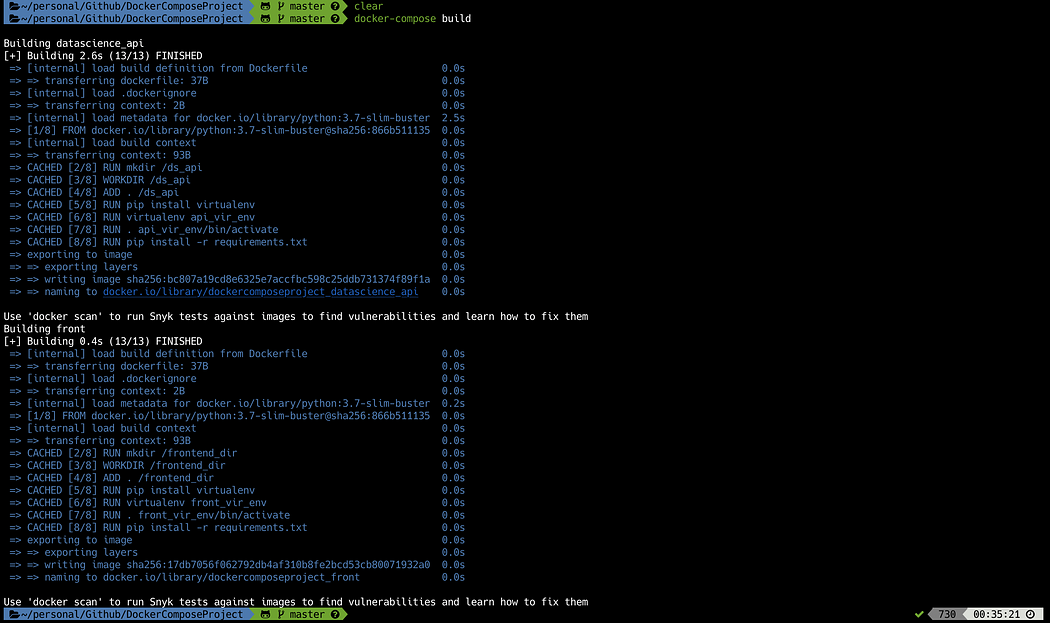
docker-compose up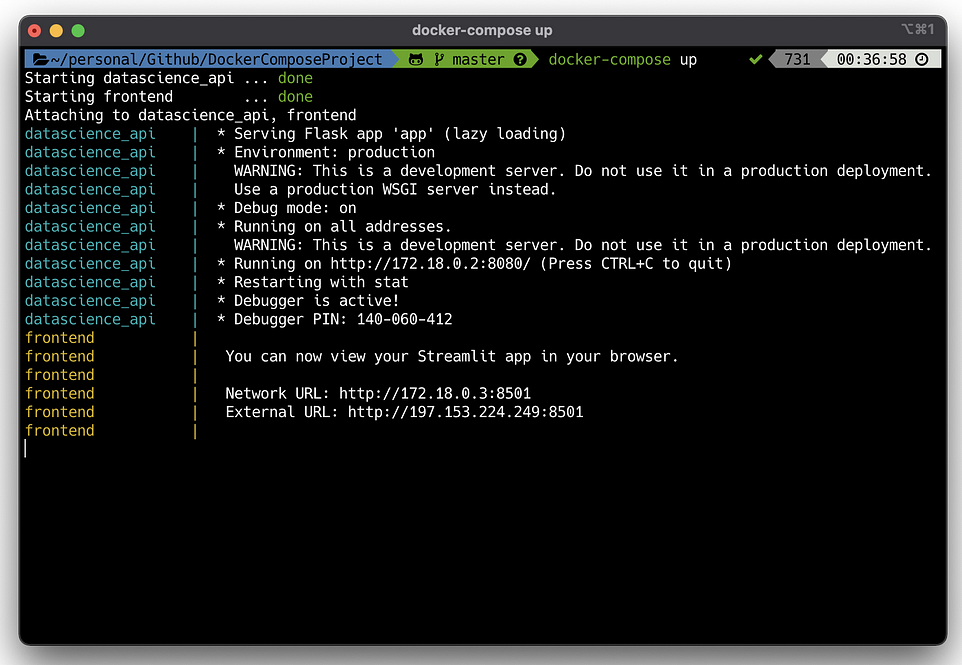
The running containers can be visualized using the following command-line:
docker-compose ps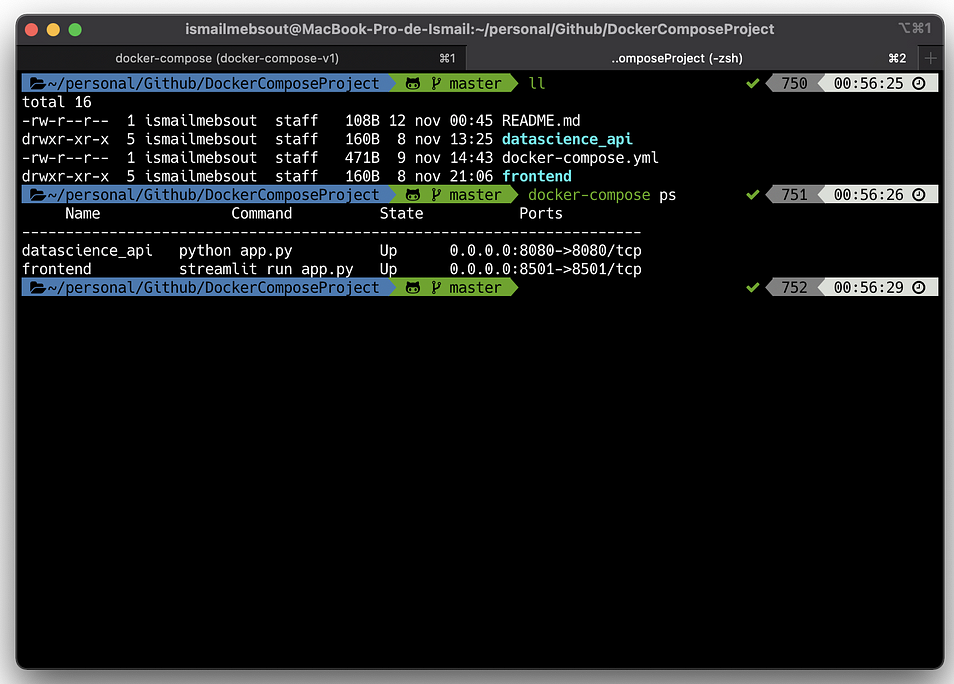
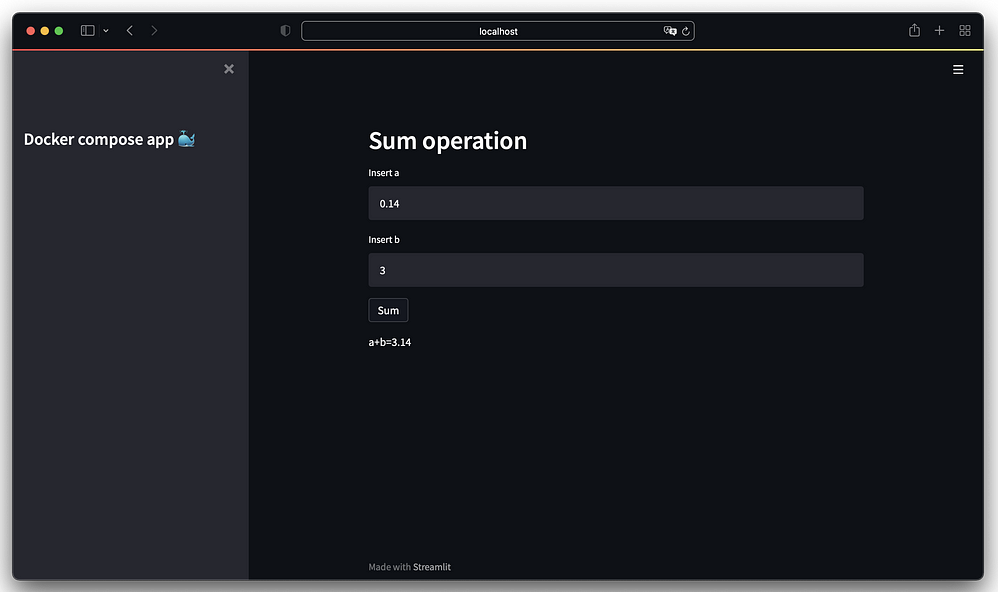
Since the same ports were used for both the container and the local machine, we can open the frontend on the browser of our machine:
You can find all the scripts in the github repository.
Best practices
- Freeze the versions of all the pulled images(python, java), using the latest can make the production environment unstable
- Launch a first container with a test entrypoint to check that all the installations were carried out properly
- Map the docker container with a volume in order to make developments in real-time without the need of rebuilding at each change
- Dockerize each service alone to facilitate the development and debugging
Conclusion
I hope you have enjoyed reading this article and gained first-hand experience of docker. It will enable you to faster and more efficiently deploy your product no matter where the developments were carried out.
Do not hesitate to check my previous DS Starter pack articles:
- Must-have tools in Data Science projects
- All you need to know about Git, GitHub & GitLab